How to create or modify child records
For each child you assess, you will need to create a new record.
Create individual new child records manually
- Select View WellComm children.
This takes you to a screen which shows a list of the children whom you have already assessed. It allows you to enter data for a new child.
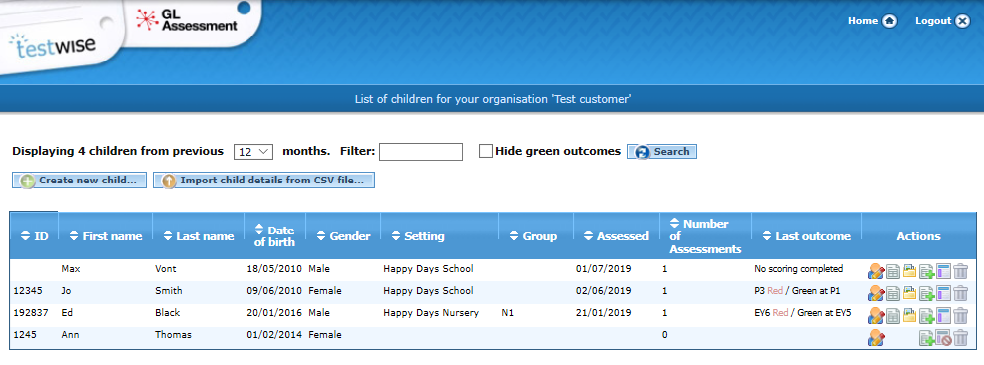
- Select Create new child.
This takes you to a screen where you can create an individual child record.
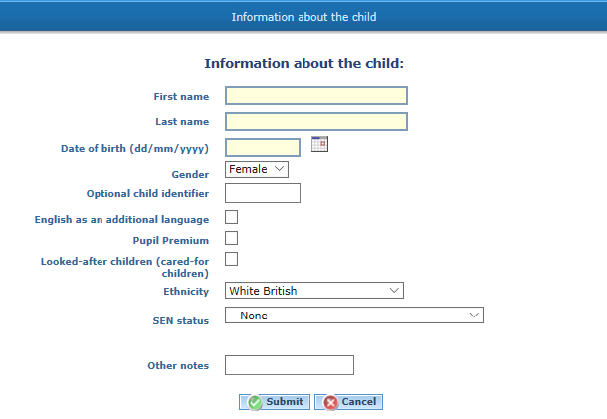
- Enter the child’s name
- Enter the date of birth by using the calendar which appears when you click in the date field.
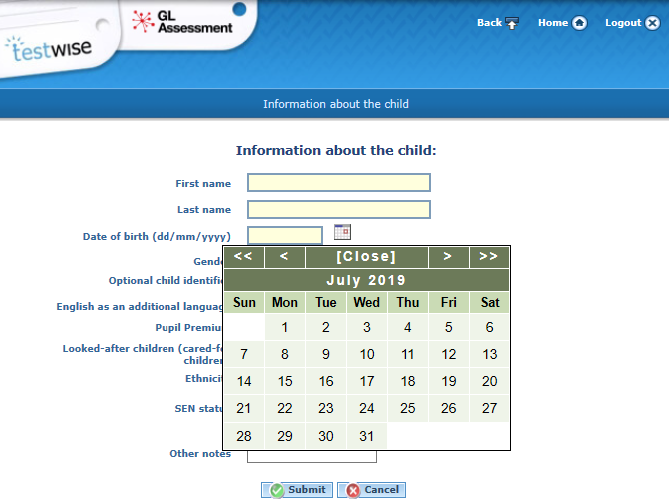
- Alternatively, you can type in the date using dd/mm/yyyy format. Do not use full stops.
- Enter the remaining information if needed:
Please remember you will not be able to run reports on the optional fields if you do not include this information.
- Gender
- English as an additional language
- Pupil premium
- Looked-after child
- Ethnicity
SEN status (a drop-down list of common special educational needs will appear as you start typing in this box) Any additional information can be included in the other notes box.
Each child will be added to your list in the ‘View WellComm Children’ section.
Create multiple new child records in bulk by CSV
You can also upload child details using a CSV file. This will save time if you already have multiple children / child data on another system.
- Select View WellComm children.
- Select Import child details from CSV.

Mandatory CSV fields are:
- First Name
- Last Name
- Date of Birth
- Gender
Optional CSV fields are:
- Group
- SEN Status
- Ethnicity
- EAL
- Pupil Premium
- Looked after child
- Child ID / UPN
Each child will be added to your list in the ‘View WellComm Children’ section.
Please remember you will not be able to run reports on the optional fields if you do not include this information.
Make changes to individual child records
You can make changes to an individual child’s record, such as changing the name or correcting the date of birth or setting.
- From the home page, select View WellComm children, this will open the List of children for your organisation page.
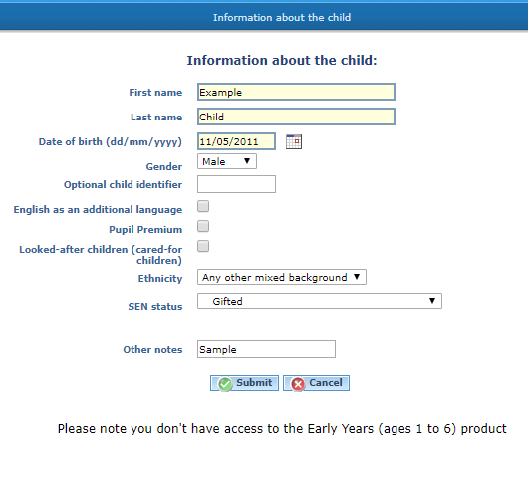
- Click on the relevant pupil’s name. This will open the Information about the child screen.
- On this screen you can edit any of the fields shown in the screenshot below.
Make bulk changes to multiple child records
You can make changes to multiple child records, like changing the group name at the beginning of a new school year. You can also make changes to any of the other fields found in Information about the child.
- From the home page, select View WellComm children, this will open the List of children for your organisation page.
- Next to each child’s record you will find check boxes – use these check boxes to select which children you would like to change.
- Select the button Export child details as CSV.
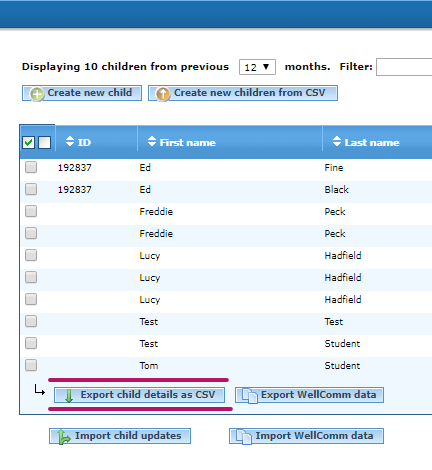
- A CSV file called WellComm child details yyyy-mm-dd will download.
- Save the file as a CSV in a memorable location on your computer.
- Make the changes to the CSV file (e.g. change Group or Setting when the child moves up a year in school) – save the changes to the CSV (don’t change the format – keep the file as a CSV).
- Upload the CSV by clicking the Import child updates button
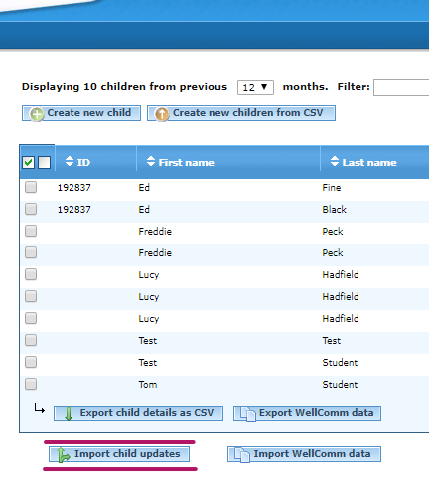
- On the next screen you will be prompted to choose the file

- Locate your file, select it, then click Submit.
- You will then either receive a success message, like this:

- Or an error message, like this:

You will receive this error message if you have tried to change more than 2 fields for any student. If you need to change more than 2 fields, you will need to split the changes over multiple uploads.
Please note, there is no limit to the number of children’s details you can change in any one upload, the limit is to the number of changes per child.

