
Navigation and Functions
Navigation Buttons
In the header area you will find the following navigation buttons:
 and
and 
These will direct you back to the previous page within the Dashboard.
There is also a help button for further support information:
Filters
The Filter and Save Selections area is where you can apply all applicable filters to the current view. All filter values reflect the current student data entered under the Students section within Testwise. The filters you see will depend on whether you are in Whole School View (WSV) or Whole Pupil View (WPV), and on which metadata template was used for your students.
Note: Filters can be applied and removed at any time.
How to Filter the GL Data Dashboard
Click Insights and Reports
 on the Testwise home screen. This will display a number of reporting options.
Click View dashboard
 on the Insights and Reports page. This is found under 'Data Dashboard'.
Note: As the GL Data Dashboard uses large volumes of reporting data, there can be a delay producing the report.
Click the Filter icon
 on the left hand side of the page to reveal a filter pane. A number of filter options will be available to apply to the dashboard.
Note: The filter pane can be minimised by clicking the arrow next to the 'Filters and Save Selections' heading.
To apply a filter, browse the available filters and selections within the filter pane. Click the checkbox of the necessary filter(s) you want to be applied to the dashboard.
Note: The checkbox will turn purple with a tick  when selected.
To reset the information in the dashboard and remove all previously applied filters, click the Clear Filters button at the bottom of the filter pane.
You can use the Save or Load Bookmarks functions within the filter pane to either save the dashboard with the applied filters or to open a previous version of the dashboard.
Bookmarks
Bookmarks allow you to save the current view of the report (page and filters applied, including Academic Year selected in Whole School View).
How to Save/Load Bookmarks in the GL Data Dashboard
To save or load a Bookmark, click the Filter button
to reveal the 'Filters and Save Selections' filter pane.At the bottom of the pane, you will have the option to either save the current view of the dashboard (Save Bookmark) or to load a previously saved version (Load Bookmark).
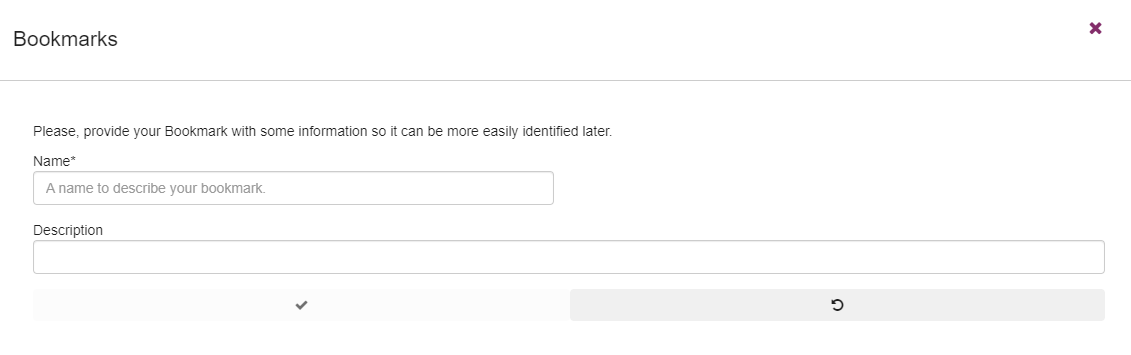
If you have clicked Save Bookmark and want to save the current view, you will need to provide a 'Name' for the bookmark. This will help the bookmark be more identifiable.
Note: When saving a bookmark, you can provide a small description of the bookmark, if required.
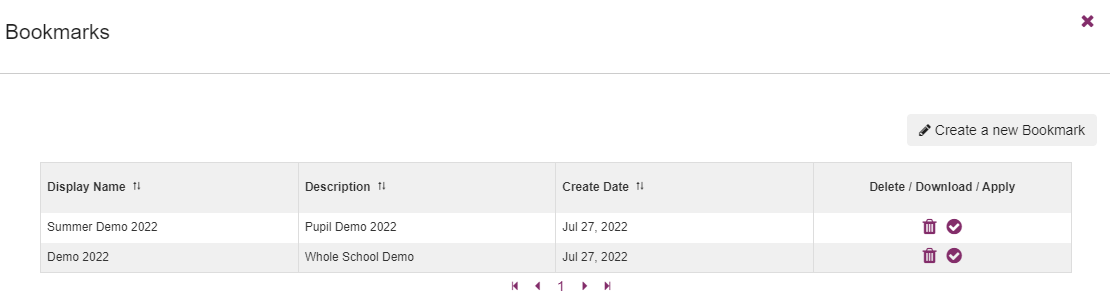
If you have clicked Load Bookmark, you will see a list of all the previously saved bookmarks.
Here you can view information about saved bookmarks: bookmark name, bookmark description and when the bookmark was created. You can also delete, download or apply bookmarks.
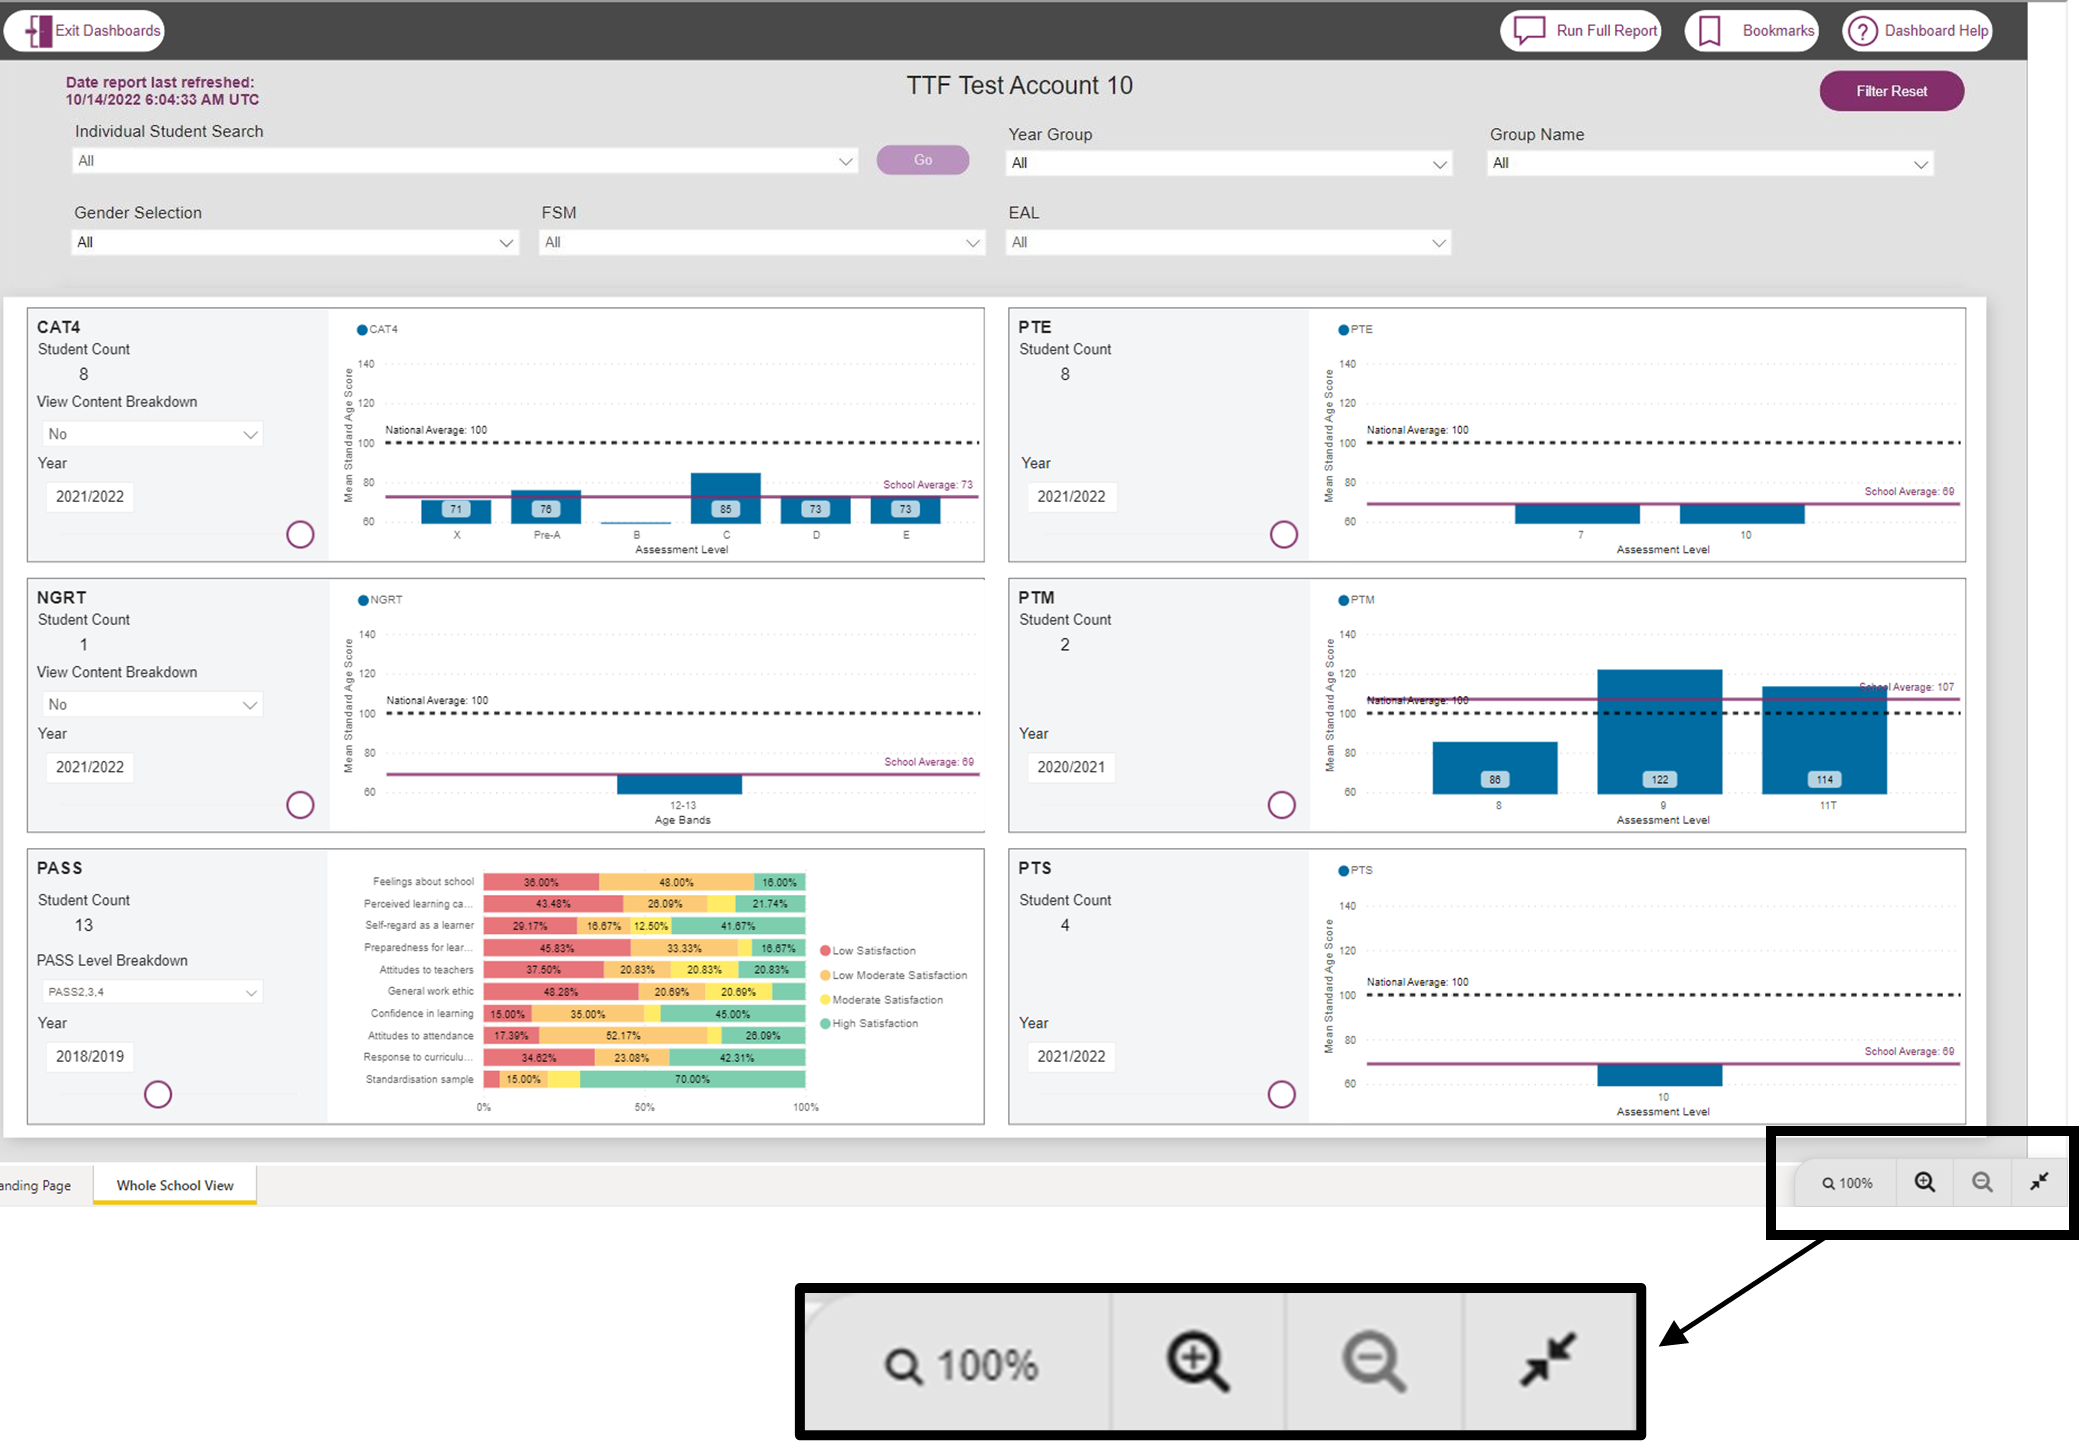
Full Screen and Zooming
The GL Data Dashboard can be enlarged using a zoom function, or made full screen through the use of full-screen mode.
How to Enlarge the GL Data Dashboard
A grey bar will be displayed at the bottom right of the dashboard screen. This will display the zoom in/out functions and the toggle full screen mode.
To zoom in/out:
Click the magnifying glass icon with a plus inside to zoom in.
Click the magnifying glass icon with a minus inside to zoom out.
To toggle full screen view:
Click the four outward arrows icon to enter full-screen mode.
Click the two inward arrows icon to exit full-screen mode.