

Importing Students into Testwise using the Wonde Portal
Wonde & GL Assessment / GL Education Relationship
Wonde connects to the information that is held within a school's MIS and uses this information to automatically populate your student records in Testwise.
This user guide gives step by step instructions on how to do this.
Step 1: Initial Set Up
If your school has not previously used Wonde
The school will need to contact Wonde directly at [email protected] to create an account and inform us when this has been done.
If your school already has Wonde
To start the process, if you have not already done so, please contact GL Assessment / GL Education via one of the following methods stating your interest:
E-mail: [email protected] with ‘Wonde’ in the subject heading.
Telephone: 0330 123 5375, select Customer Support.
Please provide the following details:
School Name
School Testwise ID
Postcode (or City, if you do not have one)
Contact Name
(please note this should be someone who has the relevant authority to approve access to your school’s Management Information System)
Contact E-mail Address Contact Telephone Number
We will then provide support (via e-mail or telephone) to begin the process of creating the connection with Wonde.
Once we have provided that support, you can then move on to Step 2 of the process.
Step 2: Logging Into The Wonde Portal
If you have administrative access to Wonde for your school, you can log in using this link:
https://edu.wonde.com/login
If you are unsure whether you have previously activated your Wonde account or if you would like to set one up, please contact [email protected] who will be happy to help.
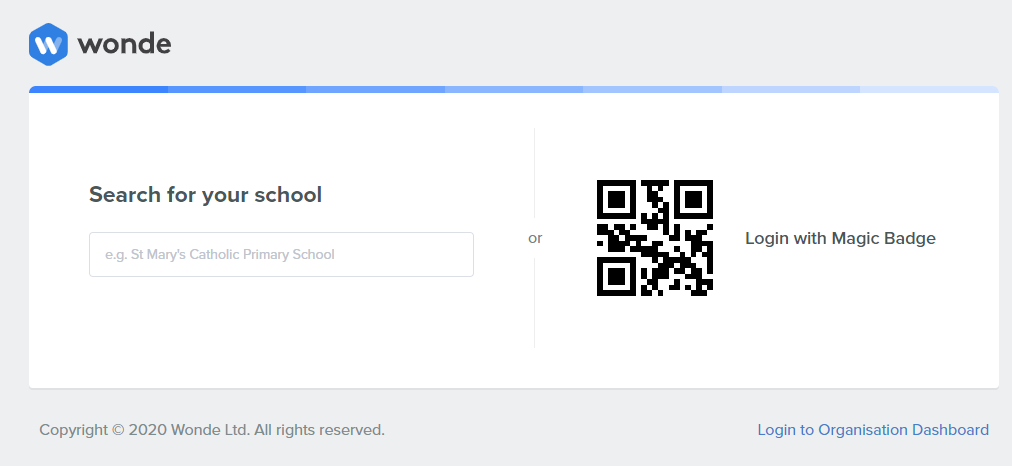
From here, you can login by searching for your school.
Search for your school; you can use your school’s postcode or school name:
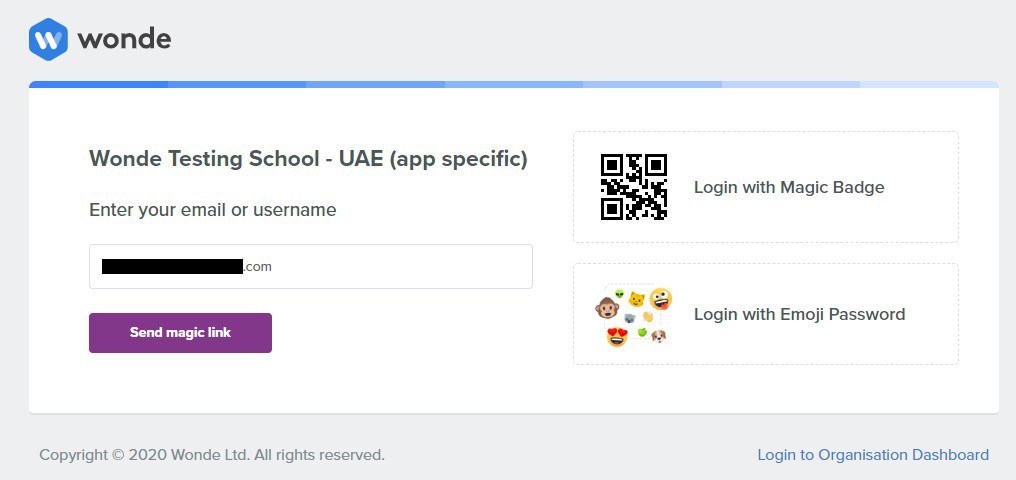
Enter your email address or username and click the ‘Send magic link’ button:
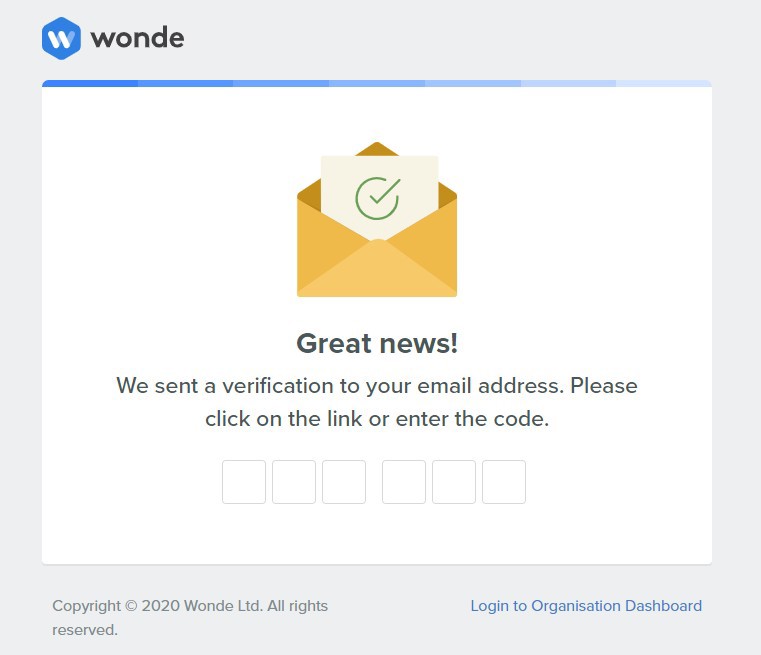
Check your email and enter the code presented within the e-mail
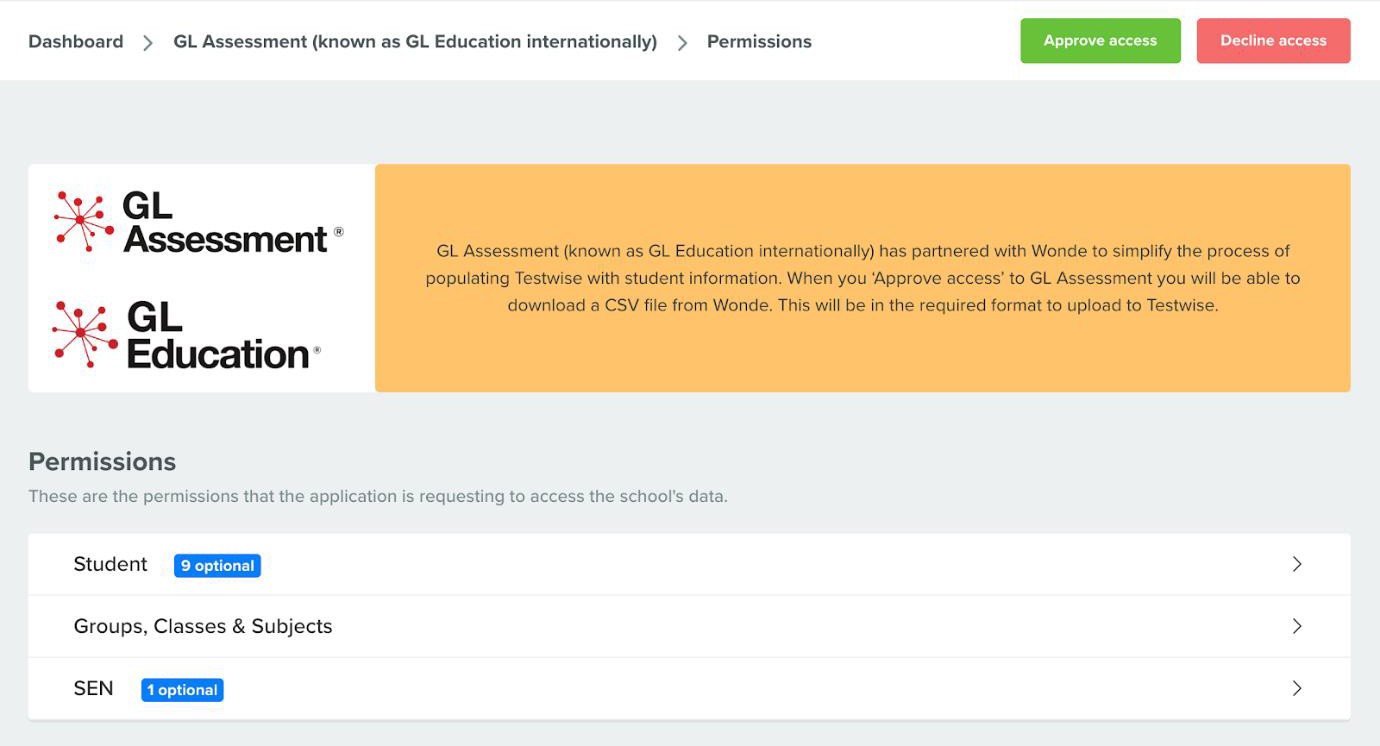
Step 3: Approving the GL Assessment Connection
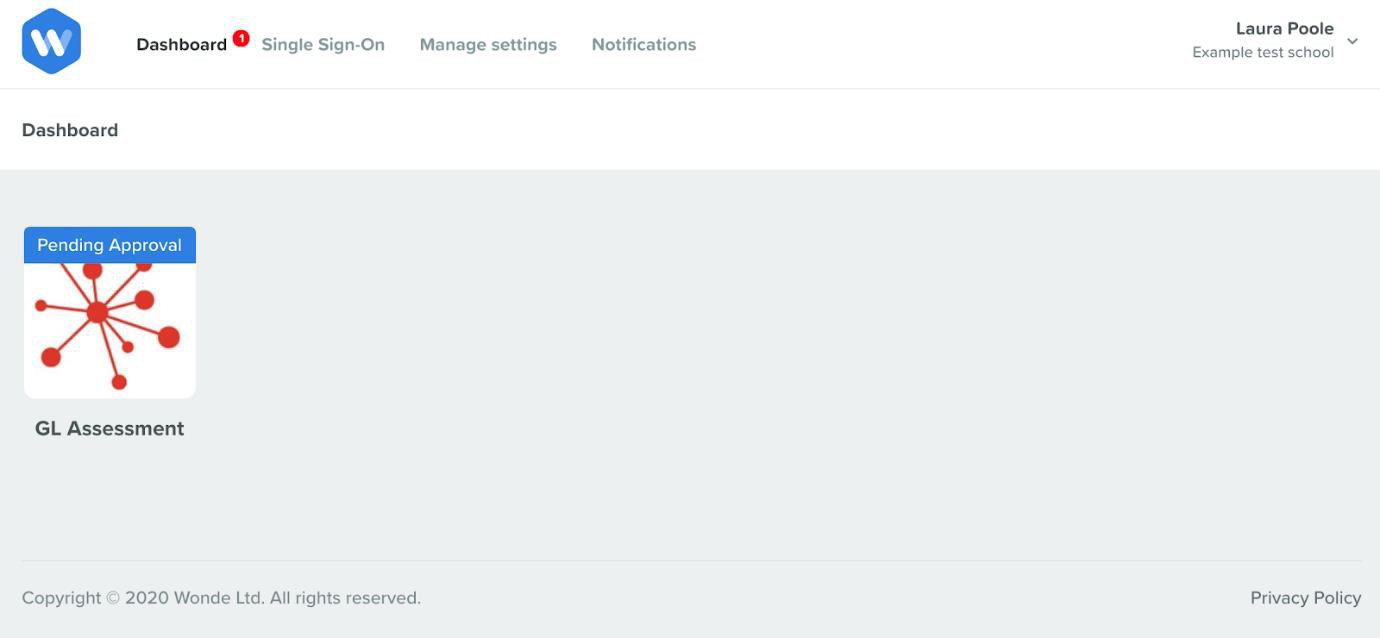
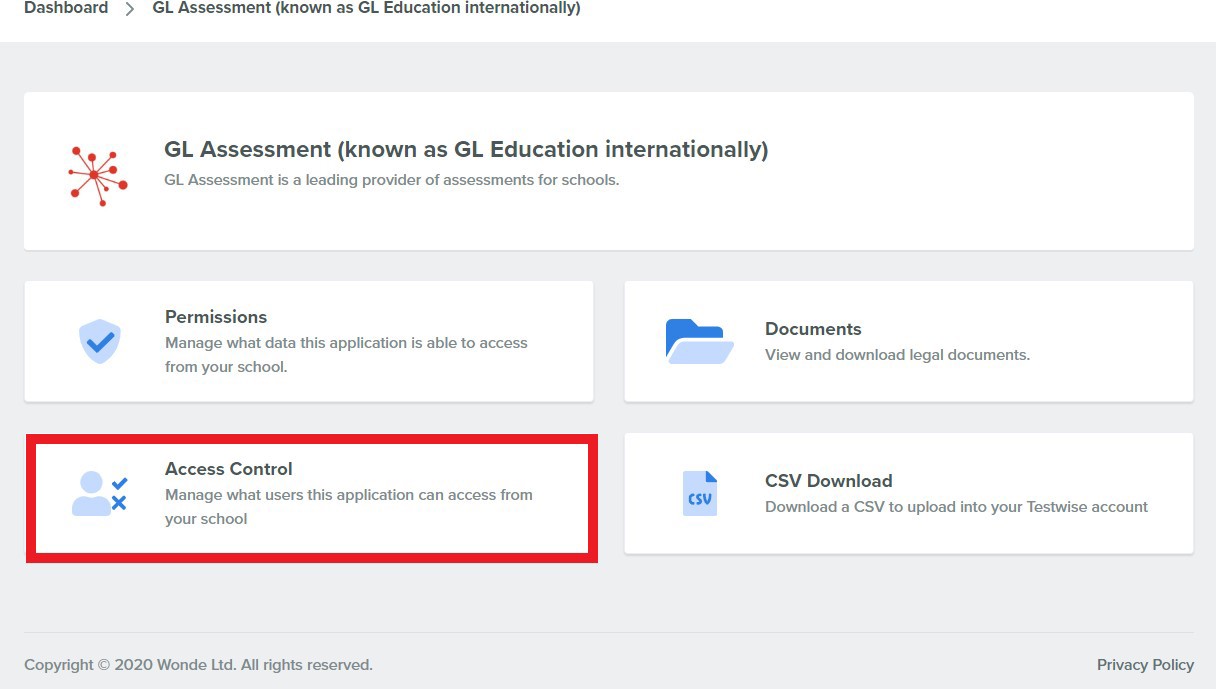
Within the Wonde Portal Dashboard, select the GL Assessment tile
Click on ‘Permissions’

From the permissions page you can take ownership of the data you would like to share with GL Assessment/GL Education.
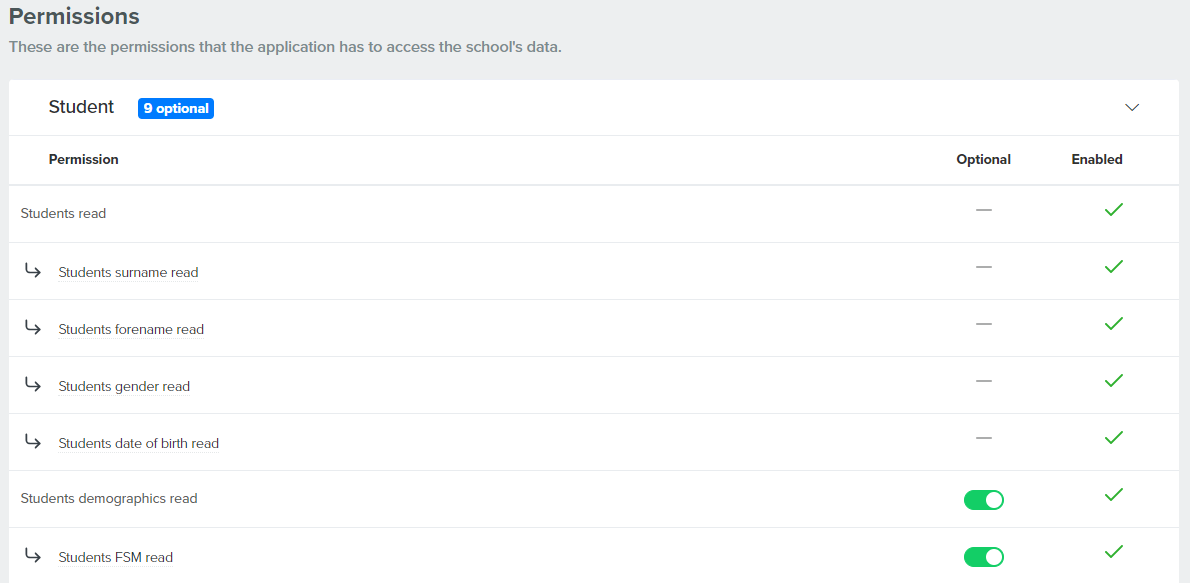
Clicking the ‘Student’, ‘Groups, Classes & Subjects’ & ‘SEN’ drop downs will show you the specific student data you will be allowing us to access.
Some of these data fields are mandatory in Testwise and they are therefore also mandatory within the Wonde portal.
However, there are optional fields that you can control within the Wonde portal, simply by enabling or disabling fields via the toggle function.
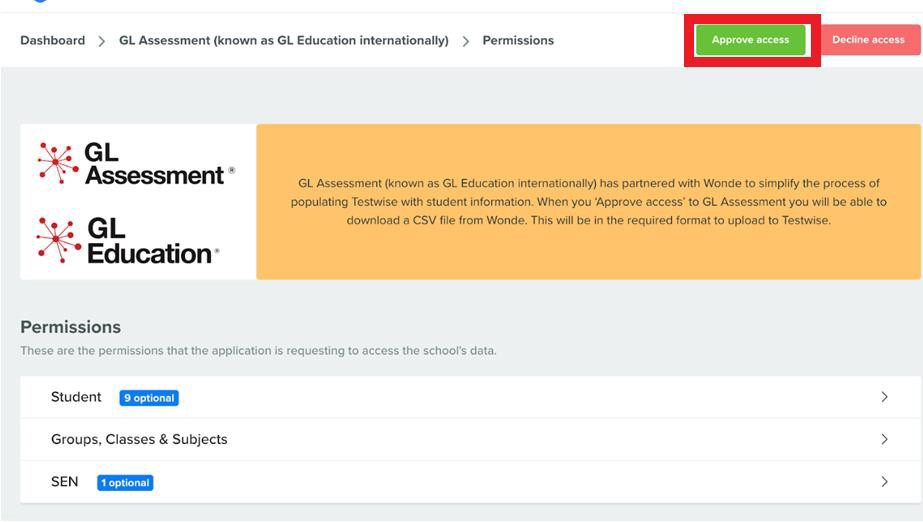
When you are happy with the data you will be providing to GL Assessment/GL Education, click the ‘Approve Access’ button
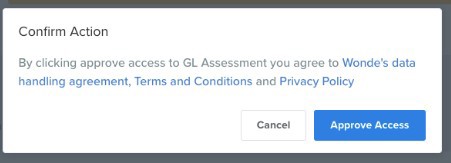
And then 'Approve Access' again on the Confirm Action dialogue box
At this point, Wonde will be sent a notification informing them that you have approved access and they will then conduct an internal audit to ensure the connection is in place and the reports are running correctly.
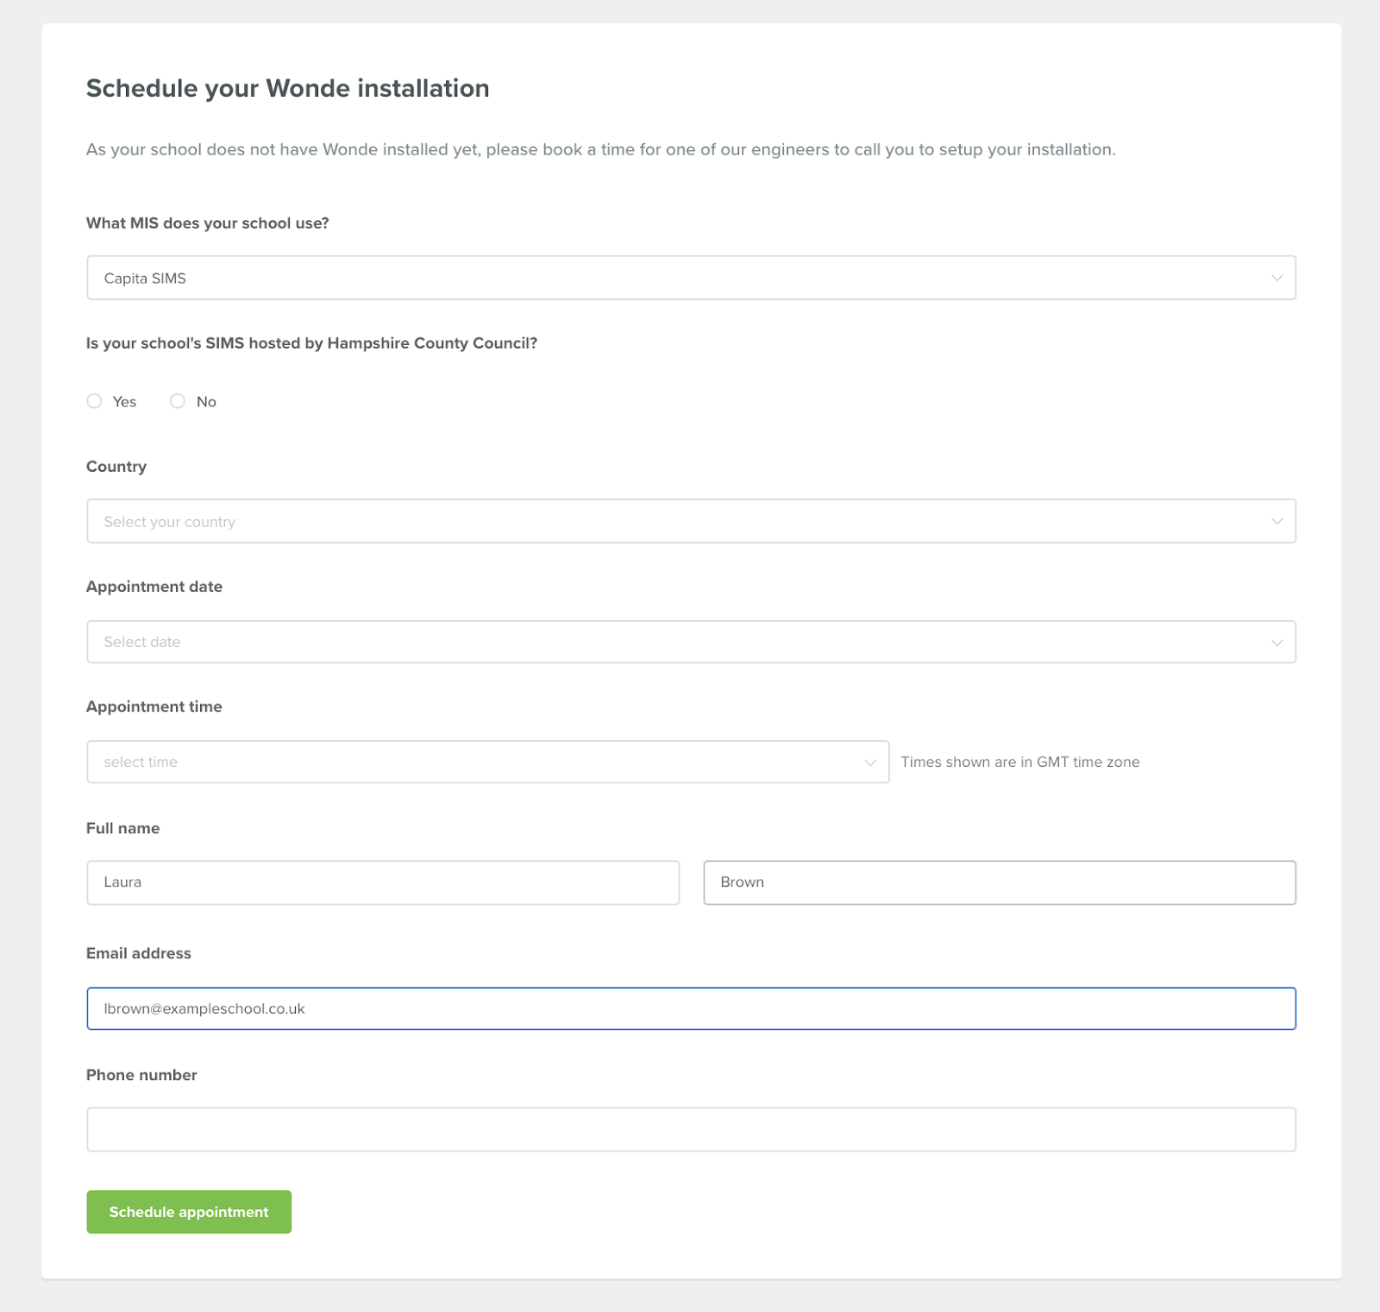
If there isn’t an existing Wonde connection at your school then you will be taken to the following page.
Depending on the MIS your school uses, you may be asked to book an appointment with a member of Wonde’s integration team (these appointments take approximately 15 minutes).
This audit can take up to a day and you will therefore need to come back to the Wonde portal to download the CSV file once this audit has been completed - please check back after a day has passed.
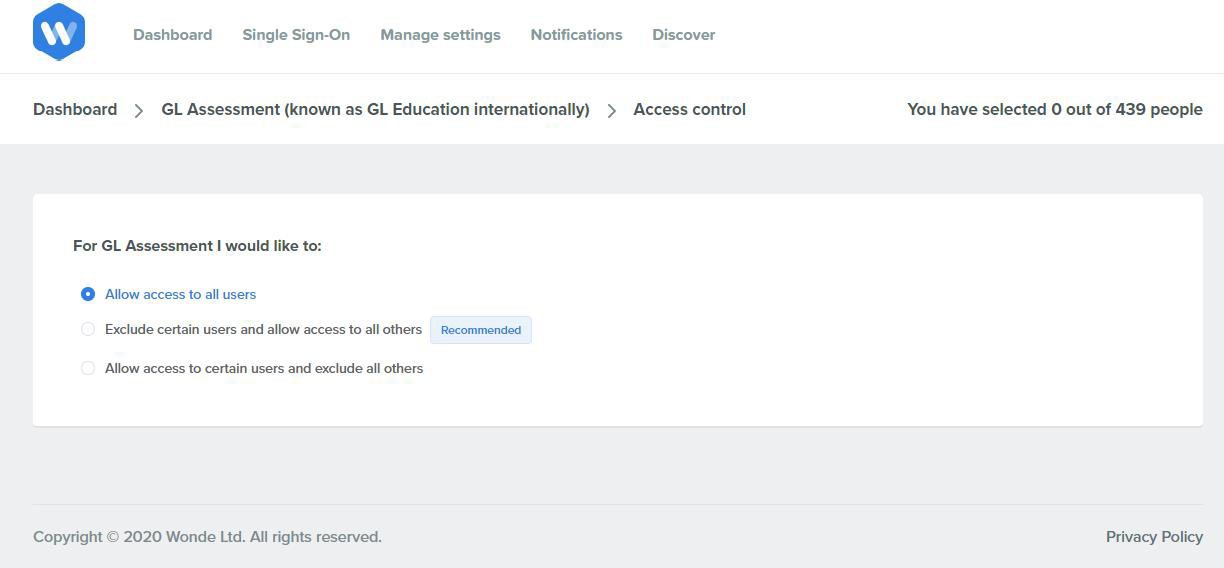
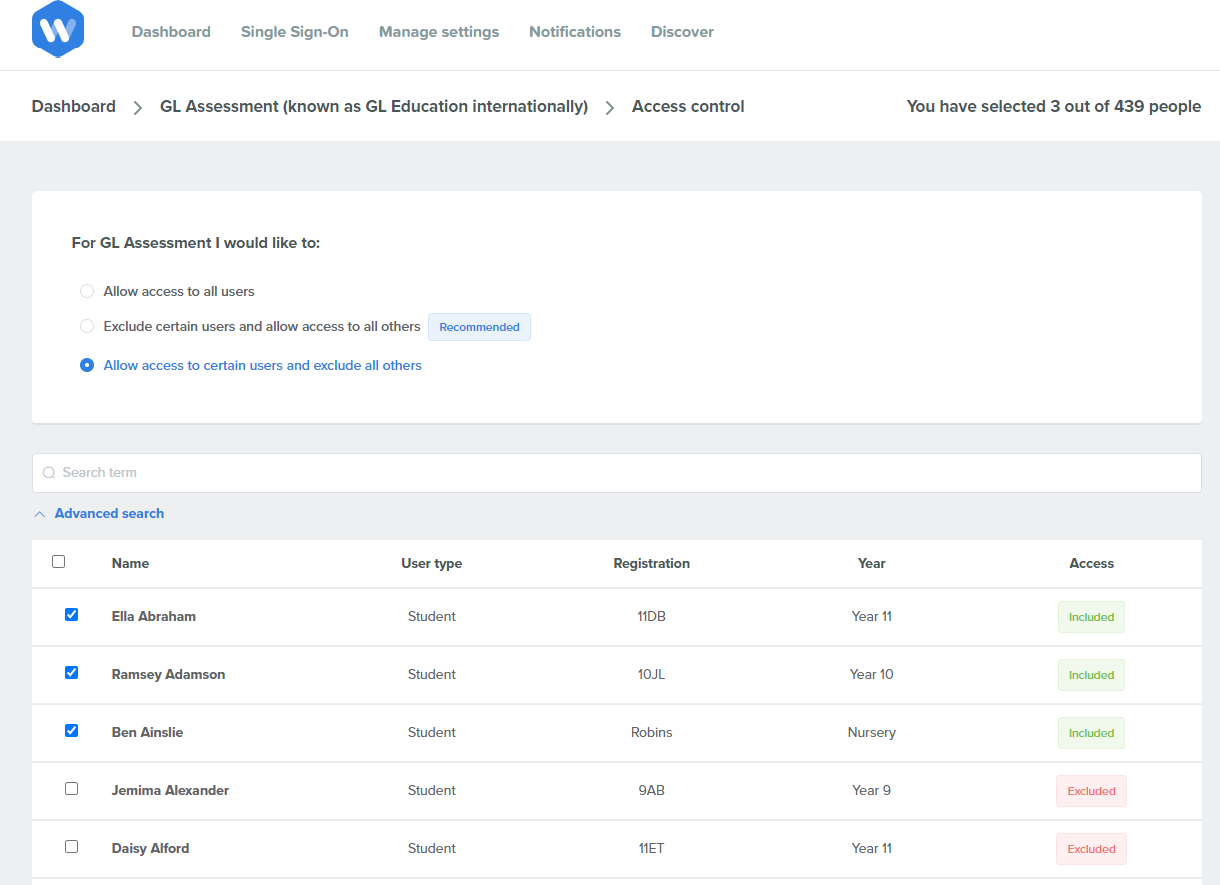
Step 4: Access Control
Once your school has approved the connection and passed Wonde’s internal audit process (i.e. the connection is in place and the reports are running correctly) both the ‘Access Control’ and ‘CSV Download’ option can then be selected.
The Access Control option allows the school to remove users from the TestWise CSV Dow nload (i.e. if a parent doesn’t want their child ’s details being shared with GL Assessment /GL Education ).
You will be presented with 3 options, select which option is most appropriate for your needs:
- Allow access to all users: This means that all users data will be available to GLAssessment/GL Education.
- Exclude certain users and allow access to all others: This will allow you to exclude studentsfrom the data provided to GL Assessment/GL Education.
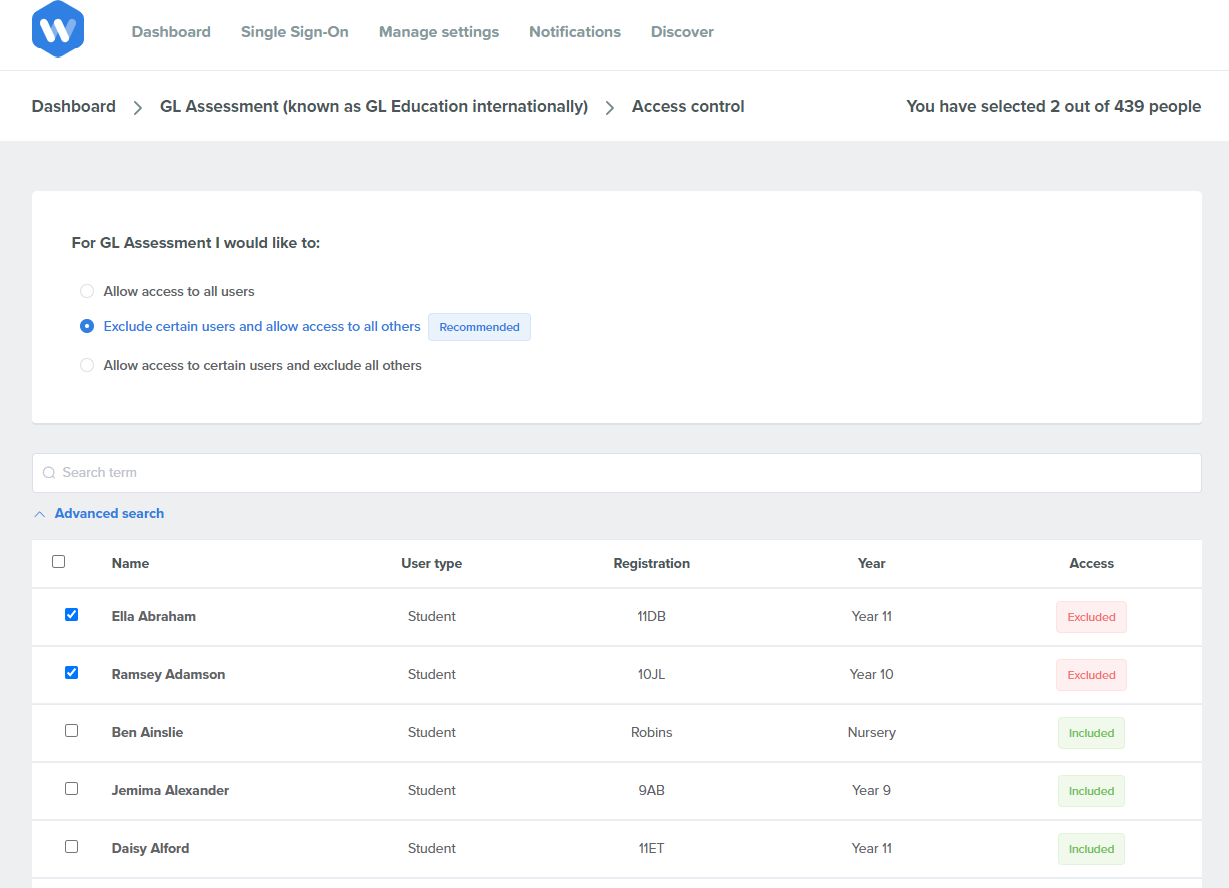
- Allow access to certain users and exclude all others:This will allow you to approve access to only certain studentsand to exclude the remaining students within your school when providing data to GL Assessment/GL Education.
Was this useful?
Our priority is to ensure you have the information you need to get the best from our products, and would like to know if this page helped you find what you needed?