

SQL Server Installation Guide
Introduction
This article provides a step-by-step procedure for installing a new instance of SQL Server 2014, using the SQL Server setup installation wizard. The SQL Server Installation Center provides a single feature tree for installation of all SQL Server components, so that you do not have to install them individually.
In this tutorial, we will show the default installation of all the features available in the SQL Server Enterprise version. You may find that in your version you don't have all those features available. It is highly recommend to read all the comments in this article before you start the installation.
* Before you start, it's highly recommend to check hardware and software requirements for Installing SQL Server 2014 (here ).

Preparation
For local installations, you must run Setup as an administrator. If you install SQL Server from a remote share, you must use a domain account that has read and execute permissions on the remote share.
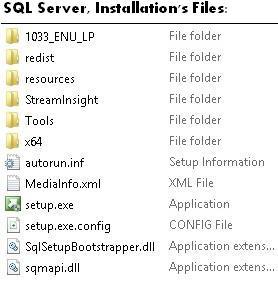
It is best to install the server from a DVD or from a mounted ISO file which behaves as a CD/DVD. In this case, once you double click the DISK icon the autorun.inf file is used by the AutoRun and AutoPlay components of Microsoft Windows operating systems. This will start the installation using the configuration in the autorun.inf file. If AutoRun is disabled on your server, you may double click setup.exe to start the installation. To install from a network share, locate the proper folder on the share, and then double-click setup.exe.
Installation, Step By Step
1. Upon starting the installation, you will get this window:
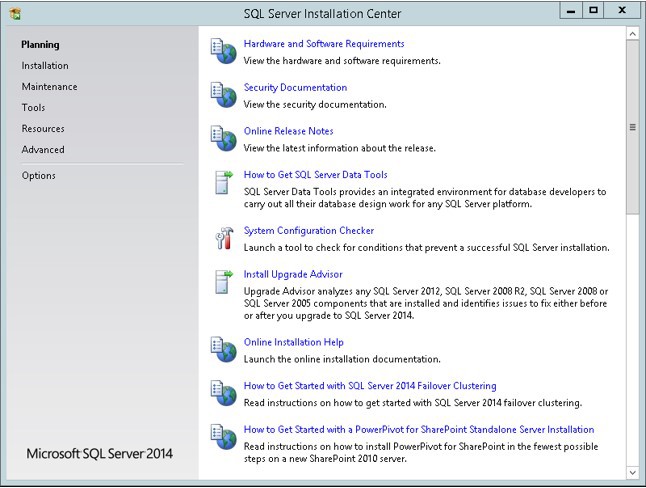
We will discuss the Planning and Installation sections of the setup program.
* It is highly recommended to go over the documentation and guides in the Planning section:
- Hardware and Software Requirement
- Security Documentation
- Online Release Notes
- How to Get SQL Server Data Tools
- System Configuration Checker
- Install Upgrade Advisor
- Online Installation Help
- How to Get Started With SQL Server 2014 Failover Clustering
- How to Get Started With PowerPivot for SharePoint Standalone Server Installation
2. Choose the Installation section in order to start the installation:
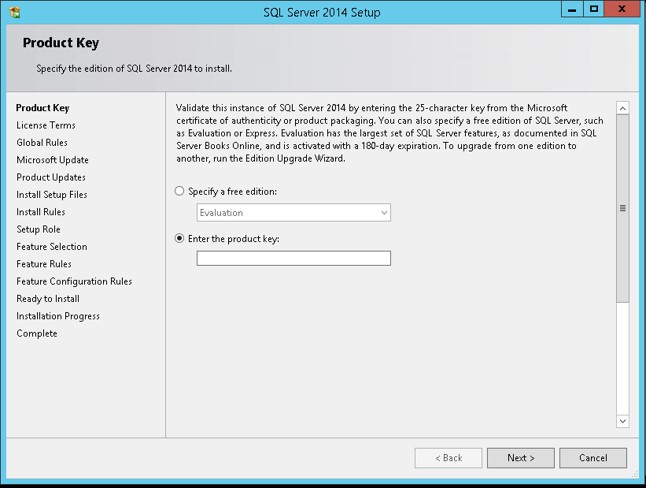
3. Enter the product key and click Next:
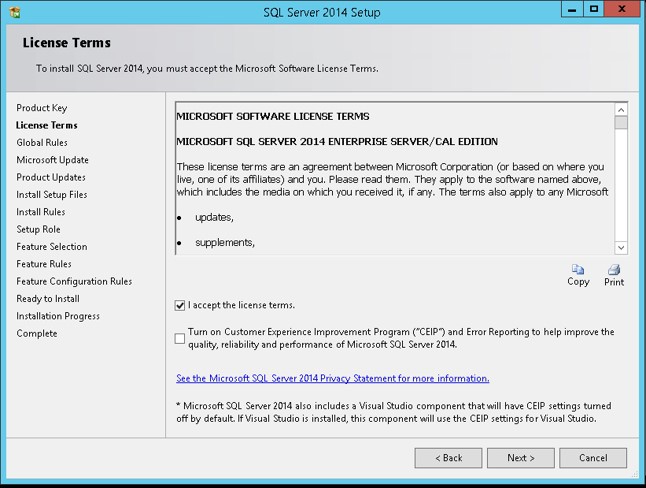
4. You have to accept the license term in order to continue.
It is highly recommend NOT to ask in the forum a question regarding Licensing. The MSDN forum interface is not for this, and good people that want to help you, can make mistakes with Licensing. It is recommend to use the direct phone number to reach the people that can give you the official answer :-)
Licensing questions: call 1-800-426-9400, Monday through Friday, 6:00 A.M. to 6:00 P.M. (Pacific Time) to speak directly to a Microsoft licensing specialist.
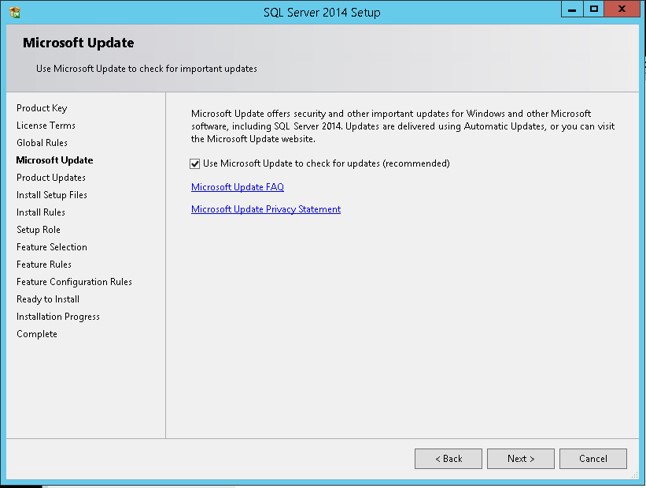
5. Mark the check box in order to use Microsoft Update to check for an update after you finished the installation, and then click Next.
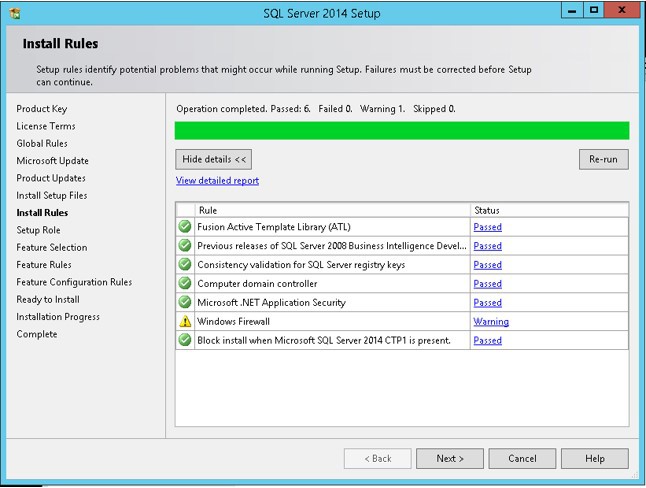
6. The SQL Server installation program checks your machine to make sure it meets the hardware and software requirements to install SQL Server. If you get any Errors in the results, please use the link in the error message to get more information.
Do not move to the next step if you get any errors in this report!
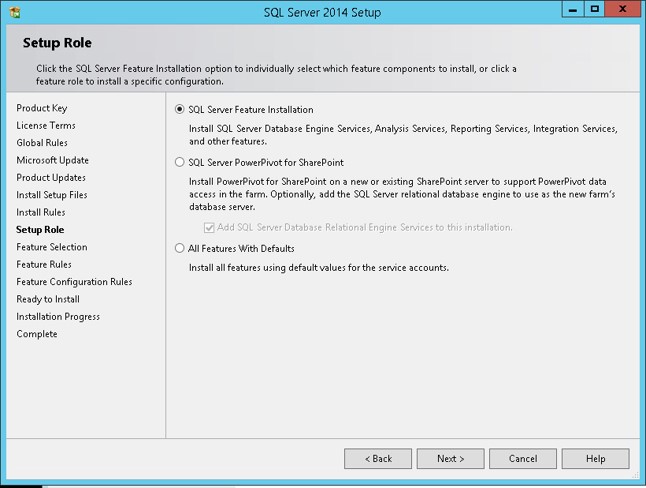
7. Choose the first option in order to install SQL Server, and then select which features to install. We are going to choose our features manually in the next step. Click Next to continue:
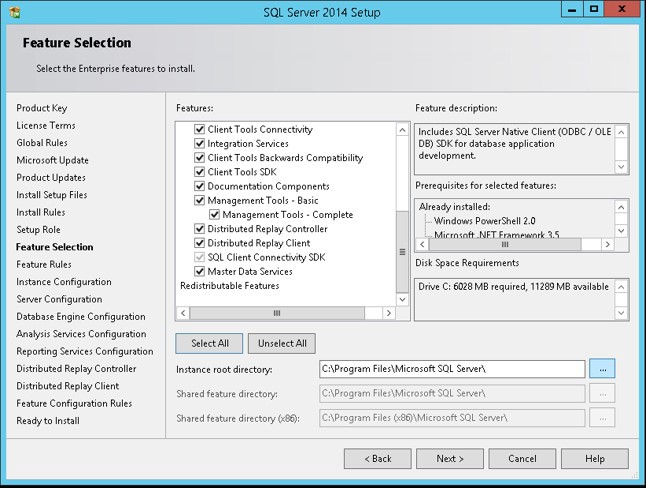
8. In this step, you can choose what features to install. It is highly recommend NOT to choose all the features on a production server if you don't need them. Choose only the features that you need or might need. Conversely you might want to select all using a development server in order to give you more flexibility in your development environment. Once you choose to use another feature you will be able to add it in production later on.
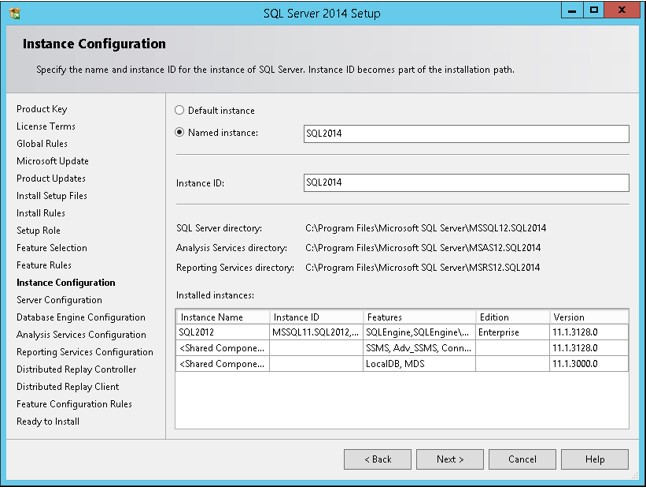
9. SQL Server allows you to install multiple instances of the same version or different versions of the server. Make sure you choose a name that will help you in the future to recognize the instance which you are working with. Theoretically you can use any instance name that you want.
* Remember the name of the instance!
You will need to use this name every time that you want to connect to the server.
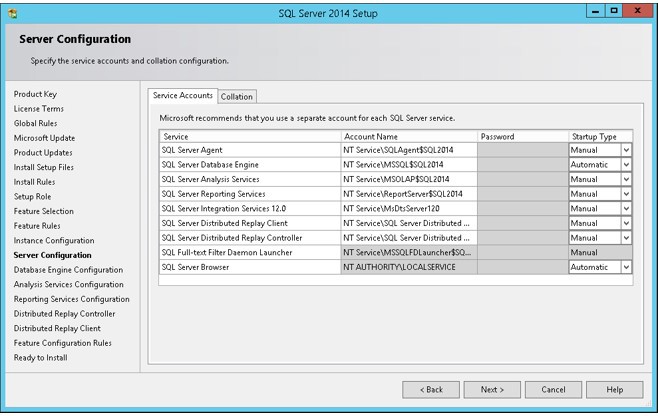
10. Security is important for every product and every business. By following simple best practices, you can avoid many security vulnerabilities. SQL Server works as a group of services in the background. In this step you can select the service accounts for the SQL Server actions. Each service in SQL Server represents a process or a set of processes to manage authentication of SQL Server operations with Windows. Each service can be configured to use its own service account. For more information you can read this article . Once you configure this step move to the collation tab!
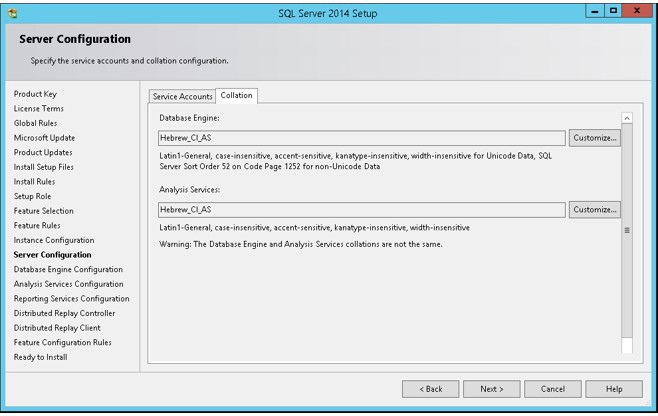
11. SQL Server supports several collations. A collation encodes the rules governing the proper use of characters for either a language, such as Hebrew or Polish, or an alphabet, such as Latin1_General (the Latin alphabet used by western European languages). Typically, you should choose a SQL Server collation that supports most languages commonly used by users at your organization. Select the collation and press next.
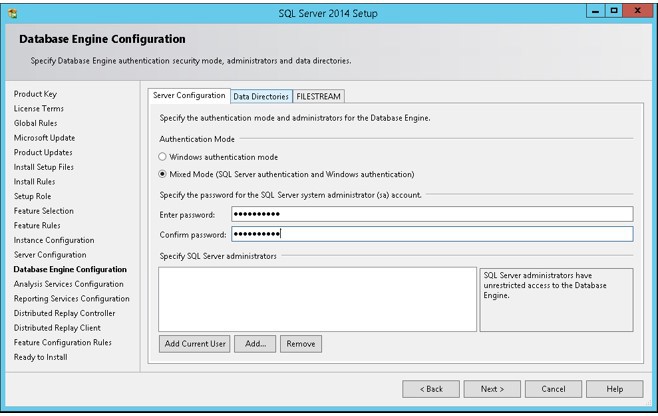
12. SQL Server can operate in one of two security (authentication) modes: (a) Windows Authentication mode which allowed a user to connect through an operating system user account. or (b) Mixed Mode which allowed users to connect to an instance of SQL Server using either Windows Authentication or SQL Server Authentication.
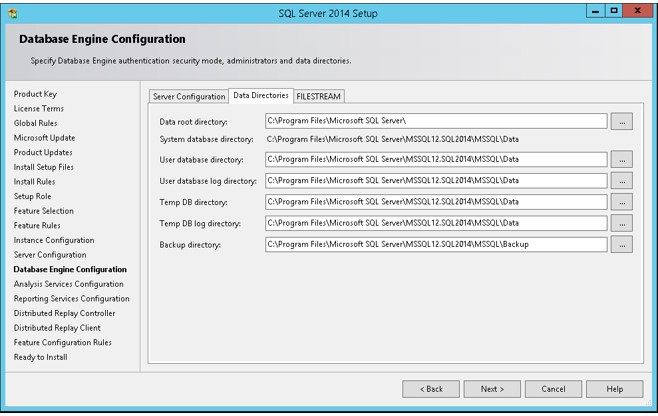
13. By default SQL Server uses the system operation disk Thus it is highly recommended to use the best practice according to your specific system and usage. Separating the LOG files from the data files can improve performance significantly. The system database tempDB is used extensively by SQL Server. This database is rebuilt each time the server is restarted. (See this article for details about TempDB) It is highly recommended to use a fast disk for this database. It is best practice to separate data, transaction logs, and tempdb for environments where you can guarantee that separation. There are important points to considerate and this article is not covering them at the moment. For small systems you can use the default configuration and later on change as needed.
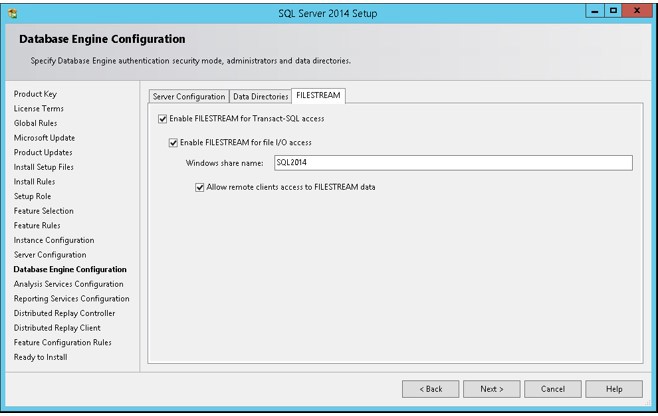
14. FILESTREAM enables SQL Server-based applications to store unstructured data, such as documents and images, on the file system. FILESTREAM integrates the SQL Server Database Engine with an NTFS file system by storing varbinary(max) binary large object (BLOB) data as files on the file system.
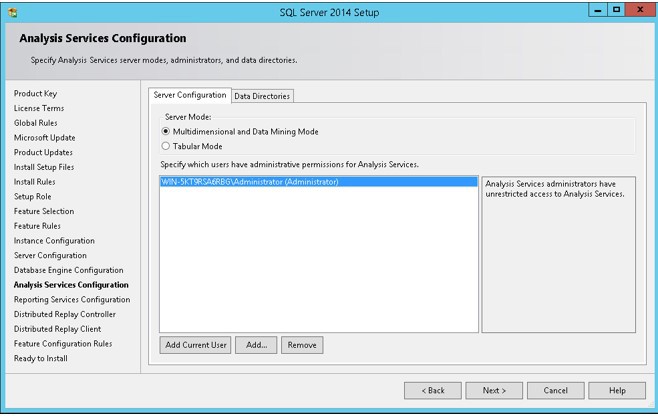
15. An instance of Analysis Services is a copy of the msmdsrv.exe executable that runs as an operating system service. Each instance is fully independent of other instances on the same server, having its own configuration settings, permissions, ports, startup accounts, file storage, and server mode properties. Server mode is a server property that determines which storage and memory architecture is used for that instance. In this step you can add windows users in order to give them administrative permissions for the Analysis Service. It is highly recommended to add the machine Administrator as well as other users who will need to manage this service. You can get more information in this link . Move to the Data Directories for next step.
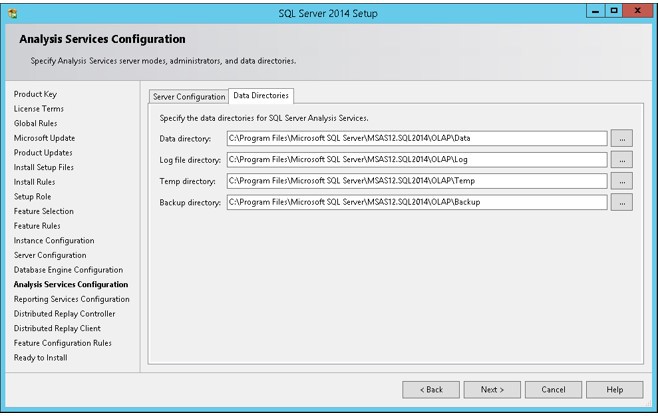
16. As mentioned in step 13 the data directories can have significant influence on the server performance. Press Next to continue the installation configuration.

17. Choose if you want to install and configure the Reporting Service or just Install, which mean you will need to configure it later on.
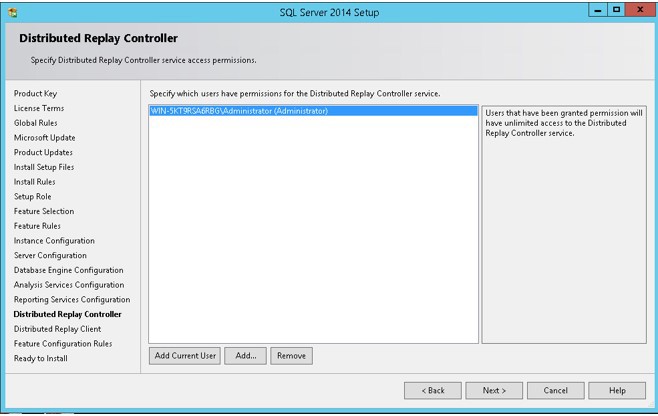
18. Before you install and use the Microsoft SQL Server Distributed Replay feature, you should review the important security information in this link .
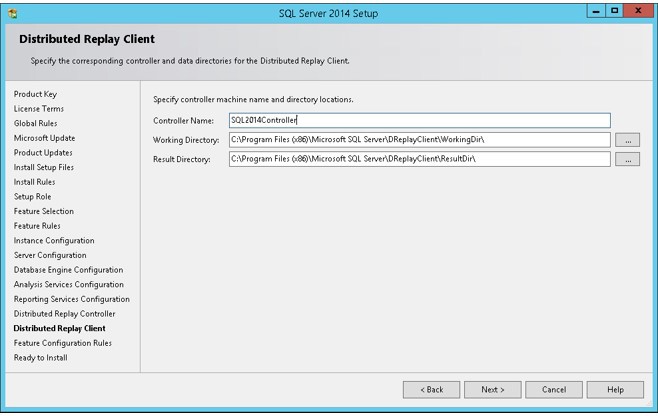
19. When installing the Microsoft SQL Server Distributed Replay features, consider the following:
- You can install the administration tool on the same computer as the Distributed Replay controller, or on different computers.
- There can only be one controller in each Distributed Replay environment.
- You can install the client service on up to 16 (physical or virtual) computers.
- Only one instance of the client service can be installed on the Distributed Replay controller computer. If your Distributed Replay environment will have more than one client, we do not recommend installing the client service on the same computer as the controller. Doing so may decrease the overall speed of the distributed replay.
- For performance testing scenarios, we do not recommend installing the administration tool, Distributed Replay controller service, or client service on the target instance of SQL Server. Installing all of these features on the target server should be limited to functional testing for application compatibility.
- After installation, the controller service, SQL Server Distributed Replay controller, must be running before you start the Distributed Replay client service on the clients.
- Make sure that the computers that you want to use meet the requirements that are described in the topic Distributed Replay Requirements.
- Before you begin this procedure, you create the domain user accounts that the controller and client services will run under. We recommend that these accounts are not members of the Windows Administrators group. For more information, see the User and Service Accounts section in the Distributed Replay Security topic.
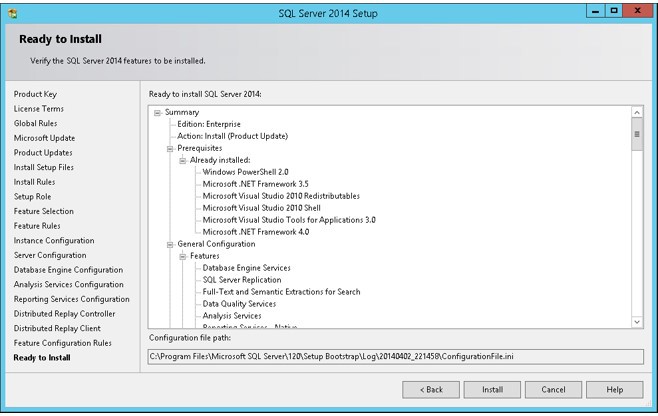
20. That is all :-) The SQL Server Installation program will show us a report of all our configuration (steps 1-19). Once you select Next, the installation will start.
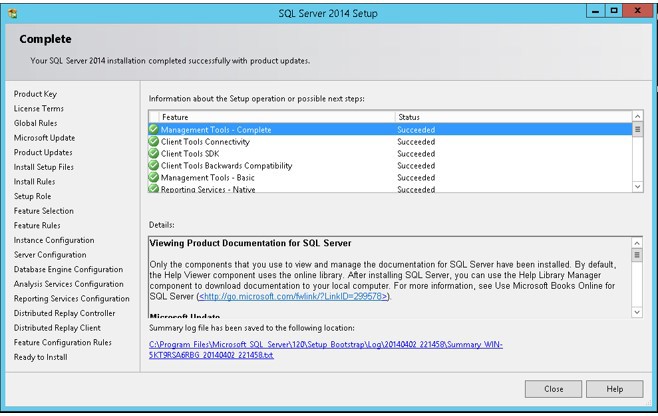
Hopefully everything went well and you should get a final report which indicates the successful completion of each installed service.
You are now ready to connect to the server :-)
Connecting to the Server
Open the new SSMS application which we have just installed (in step 8 we choose which features to install, If you have chosen Management Tools it includes the SQL Server Management Studio).
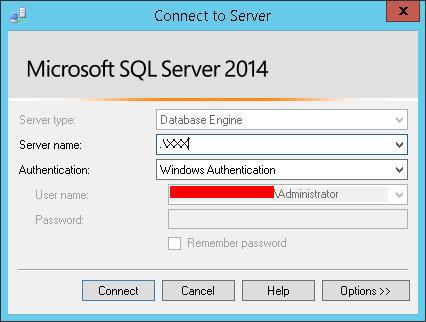
During step 9 we choose an instance name for our new installation. We told you to Remember the name of the instance. Now it is time to use it.
Start the SSMS application and use the information as shown in the image above in order to connect the server. You should replace the "XXX" text with the instance name that you choose.
* For any question regarding the installation you can use the MSDN forums (English Forum , Hebrew Forum).
Resources & More Information
- Hardware and Software Requirements for Installing SQL Server 2014
http://msdn.microsoft.com/en-us/library/ms143506(v=sql.120).aspx - Guidelines on choosing Service Accounts for SQL Server Services:
http://support.microsoft.com/kb/2160720 - Security Considerations for a SQL Server Installation:
http://technet.microsoft.com/en-us/library/ms144228.aspx - Authentication Modes:
http://technet.microsoft.com/en-us/library/aa905171(v=sql.80).aspx - Database Engine Configuration - Data Directories:
http://msdn.microsoft.com/en-us/library/cc281941(v=sql.120).aspx - Understanding Logging in Tempdb. Is Tempdb Recreated or Rebuilt after SQL Server Starts?:
http://social.technet.microsoft.com/wiki/contents/articles/23604.understanding-logging-in-tempdb-is-tempdb-recreated-or-rebuilt-after-sql-server-starts.aspx - FILESTREAM (SQL Server):
http://technet.microsoft.com/en-us/library/gg471497.aspx - Analysis Services Instance Management:
http://msdn.microsoft.com/en-us/library/hh230806.aspx - Data Directories Recommendations - Forum discussion:
http://social.msdn.microsoft.com/Forums/sqlserver/en-US/c454375e-046d-4ccd-a496-cb5725748681/sql-2012-data-directories-recommendations - Distributed Replay Security:
http://technet.microsoft.com/en-us/library/ff878263.aspx - Install Distributed Replay (Setup):
http://msdn.microsoft.com/en-us/library/gg471548.aspx - MSDN English Forum:
http://social.msdn.microsoft.com/Forums/sqlserver/en-US/home?forum=sqlgetstarted - MSDN Hebrew Forum:
http://social.technet.microsoft.com/Forums/he-IL/home?forum=sqlhe - Install SQL Server 2012 from the Installation Wizard (Setup):
http://msdn.microsoft.com/en-us/library/ms143219.aspx